Explore the Azure Machine Learning workspace

Have dual bachelor degrees in BSc in Control Engineering and Computer Engineering and MSc in Artificial Intelligence. Have worked as .net fullstack/ backend developer almost 5 years now. Passionate about both Software and AI Engineering. Specializing in Azure Cloud currently.
Azure Machine Learning provides a data science platform to train and manage machine learning models. In this article, we’ll create an Azure Machine Learning workspace and explore the various ways to work with the workspace.
Provision an Azure Machine Learning workspace
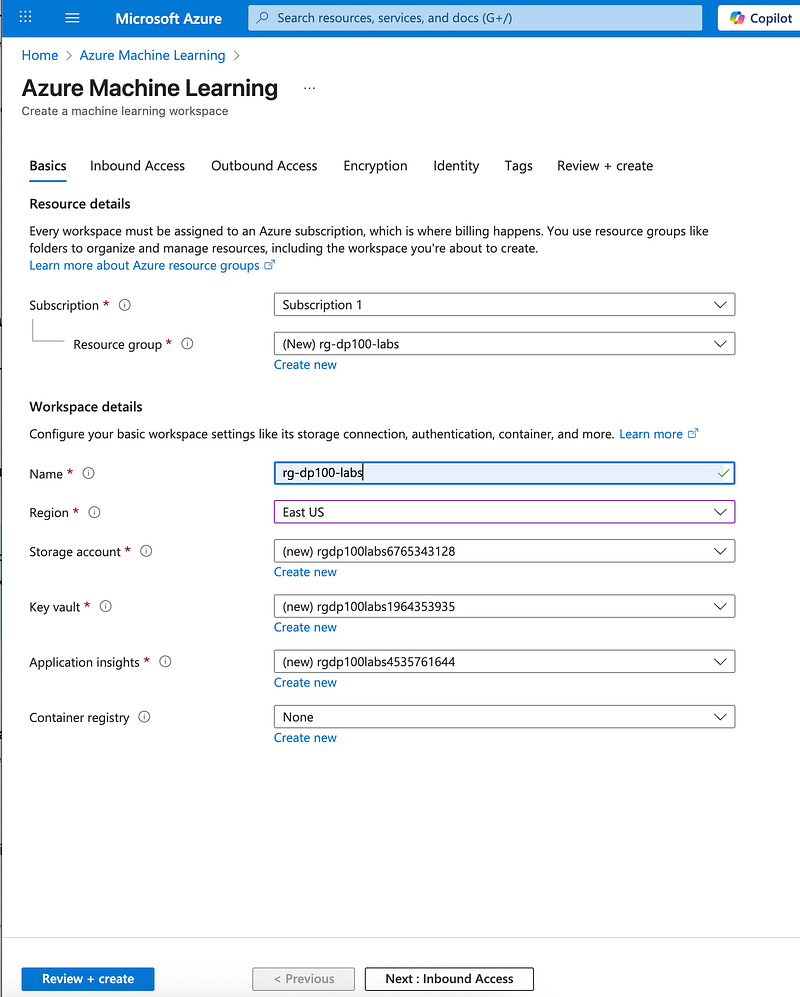
An Azure Machine Learning workspace is the main hub where you organize and manage all the resources and assets required for training and operating your models. You can set up a workspace through the Azure portal’s graphical interface or by using the Azure CLI with the Machine Learning extension. For production use, it’s generally recommended to automate workspace creation with the CLI so it can be integrated into a consistent, repeatable DevOps workflow.
In this article, we’ll use the Azure portal to provision Azure Machine Learning to explore all options.
Explore the Azure Machine Learning studio
Azure Machine Learning studio is a web-based portal that gives you access to your Azure Machine Learning workspace. From the studio, you can manage all the resources and assets within that workspace.
To open it:
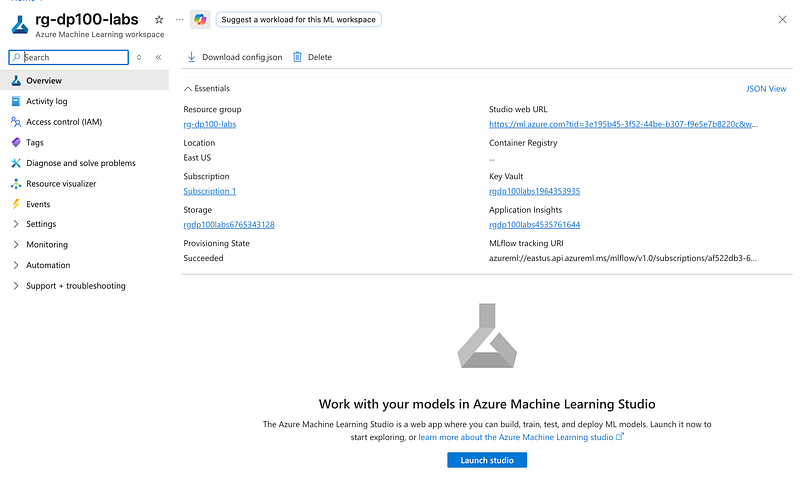
Go to your Azure Machine Learning workspace.
On the Overview page, select Launch studio.
A new browser tab will open with Azure Machine Learning studio.
Note the Authoring section, which includes Notebooks, Automated ML, and Designer. These are the three ways you can create your own machine learning models within the Azure Machine Learning studio.
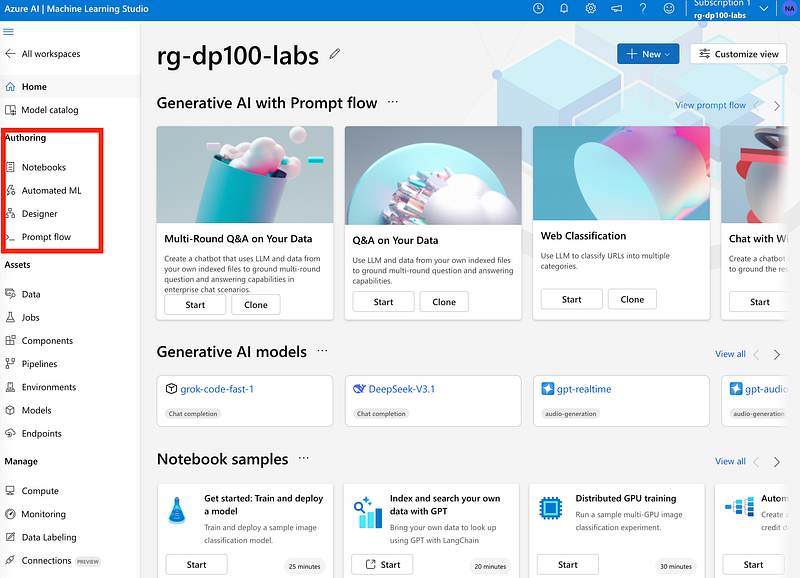
Note the Assets section, which includes Data, Jobs, and Models among other things. Assets are either consumed or created when training or scoring a model. Assets are used to train, deploy, and manage your models and can be versioned to keep track of your history.
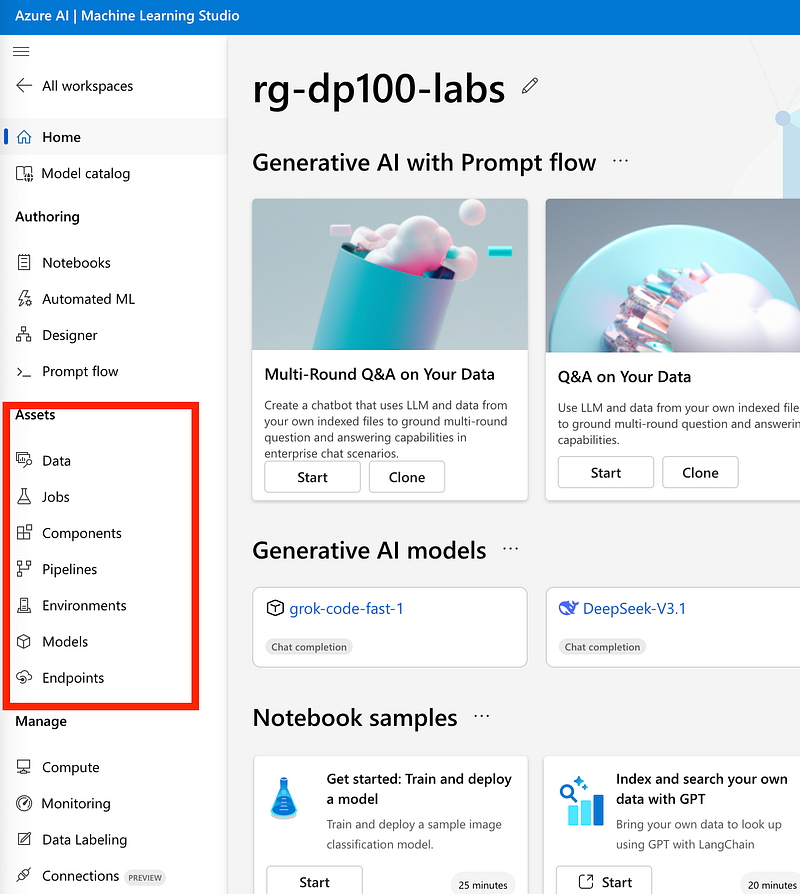
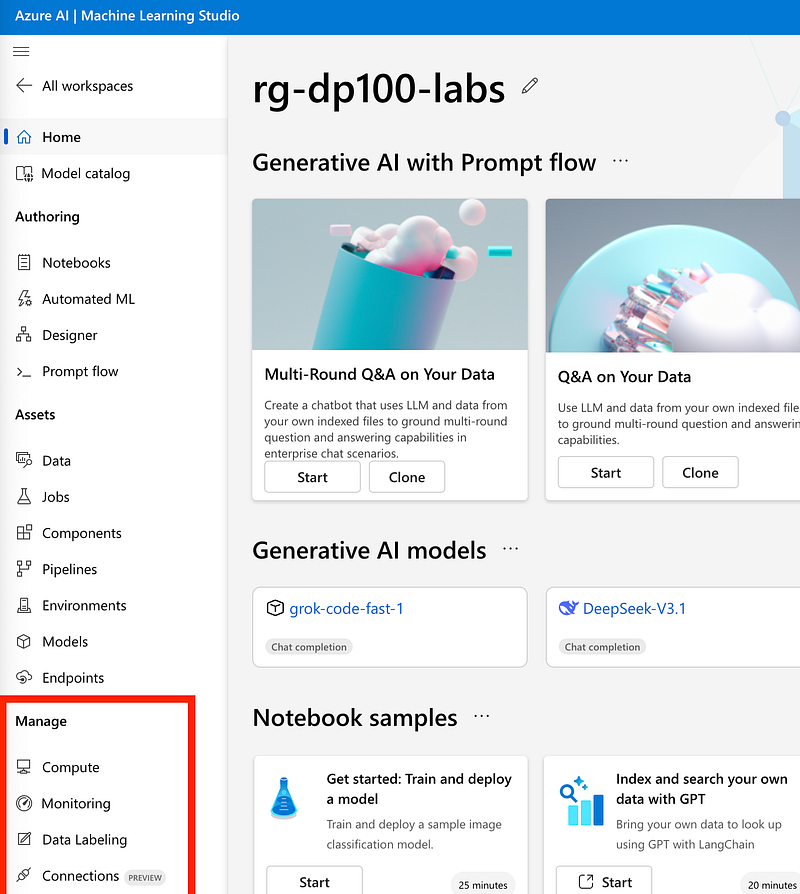
Note the Manage section, which includes Compute among other things. These are infrastructural resources needed to train or deploy a machine learning model.
Train a model using AutoML
To explore the use of the assets and resources in the Azure Machine Learning workspace, let’s try and train a model.
A quick way to train and find the best model for a task based on your data is by using the AutoML option.
Download the training data that will be used at https://github.com/MicrosoftLearning/mslearn-azure-ml/raw/refs/heads/main/Labs/02/diabetes-data.zip and extract the compressed files.
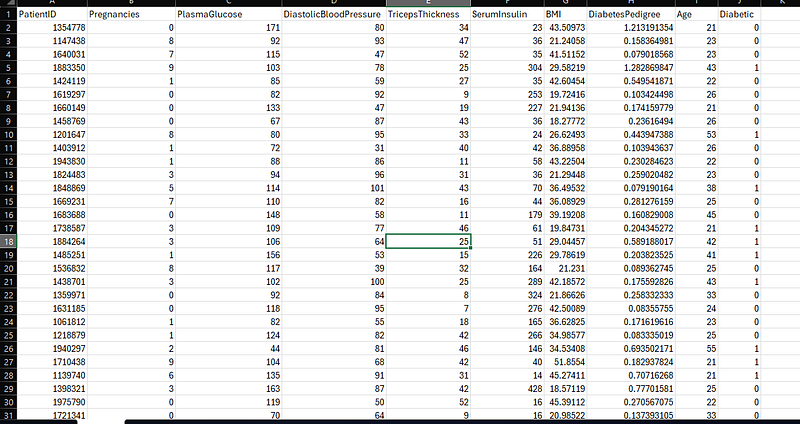
Dataset Overview
The dataset contains health-related measurements for patients, with the goal of predicting whether a patient has diabetes (Diabetic column). Each row represents a patient record.
PatientID → Unique identifier for each patient (not used in training).
Pregnancies → Number of times the patient has been pregnant.
PlasmaGlucose → Plasma glucose concentration.
DiastolicBloodPressure → Patient’s blood pressure (mm Hg).
TricepsThickness → Triceps skin fold thickness (mm).
SerumInsulin → Serum insulin level.
BMI → Body Mass Index.
DiabetesPedigree → A score indicating family history of diabetes.
Age → Age of the patient.
Diabetic → Target variable (1 = diabetic, 0 = not diabetic).
This dataset is commonly used in machine learning tutorials because it is small, easy to understand, and demonstrates how health indicators can be used for binary classification (predicting diabetes risk).
MLTable Definition
To use the diabetes dataset in Azure Machine Learning, we first define it as an MLTable. An MLTable is a configuration file that describes how data should be read and transformed.
MLTable file:
# MLTable definition file
paths:
  - file: ./diabetes.csv
transformations:
  - read_delimited:
      delimiter: ','
      encoding: 'ascii'
paths → points to the dataset file (
diabetes.csv).read_delimited → tells Azure ML that the file is a CSV.
delimiter → specifies that values are separated by commas.
encoding → defines the text encoding (ASCII here).
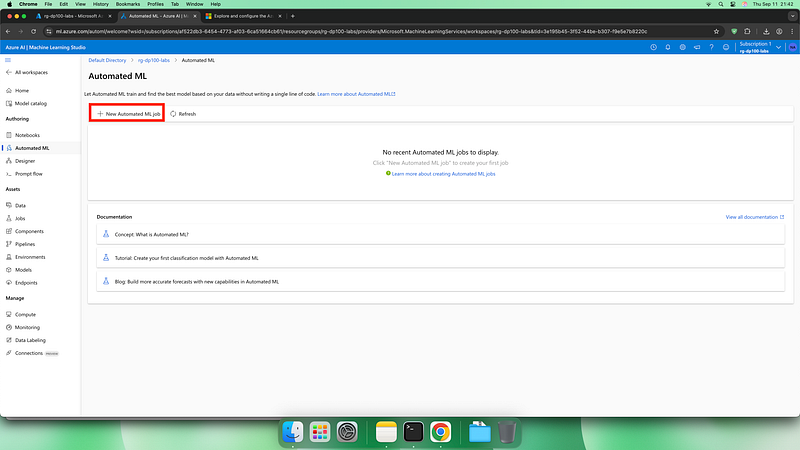
This ensures the dataset is loaded correctly and consistently across different environments, making experiments reproducible.2. Back in the Azure Machine Learning studio, select the AutoML page from the menu on the left side of the studio.
Select + New Automated ML job.
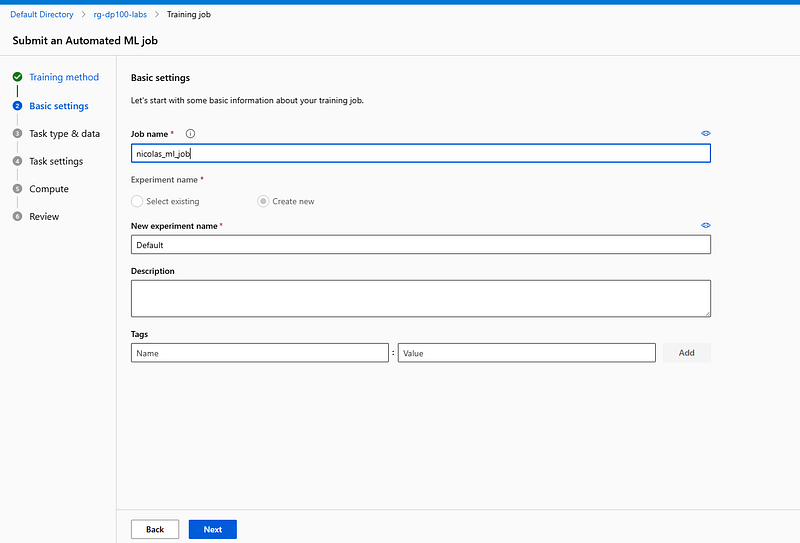
In the Basic settings step, give a unique name to your training job and experiment or use the default values assigned. Select Next.
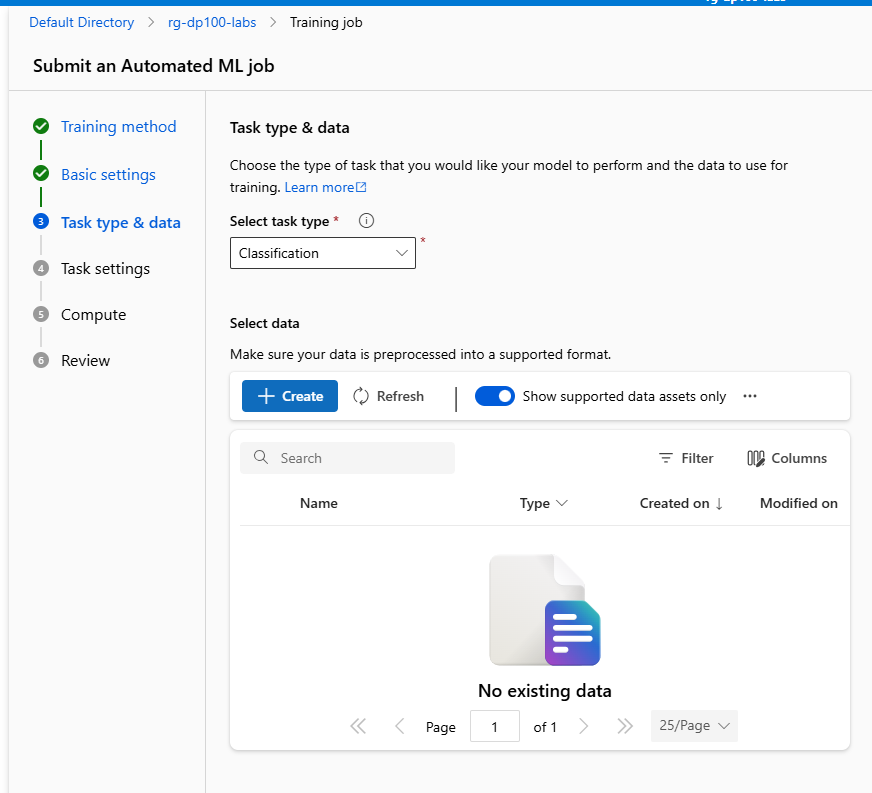
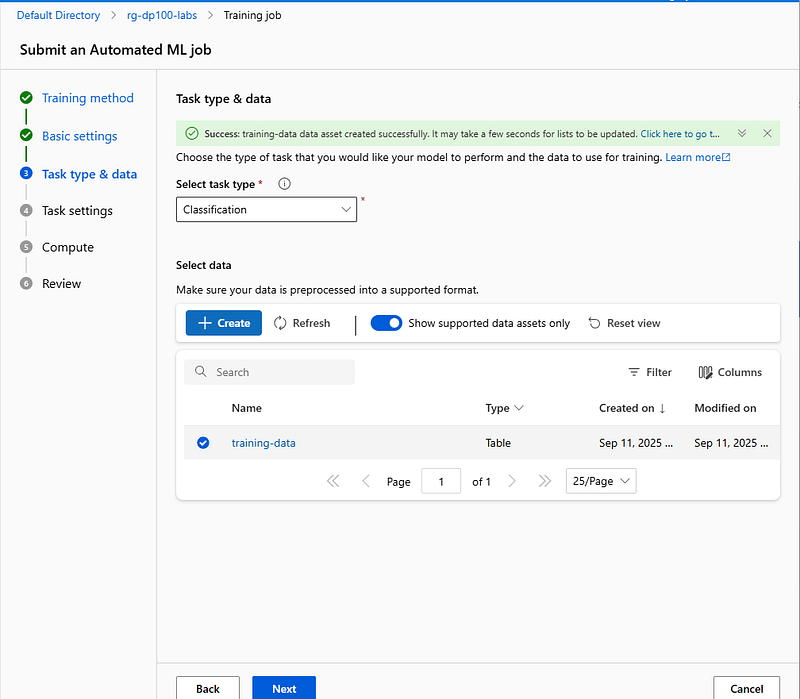
In the Task type & data step, select Classification as the task type, and select + Create to add your training data
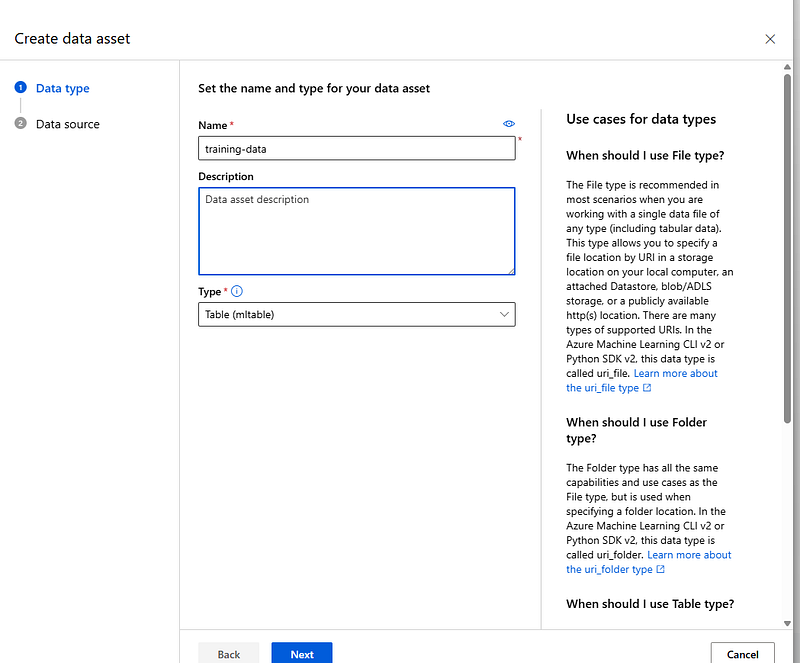
On the Create data asset page, in the Data type step, give a name to your data asset (e.g training-data) and select Next.
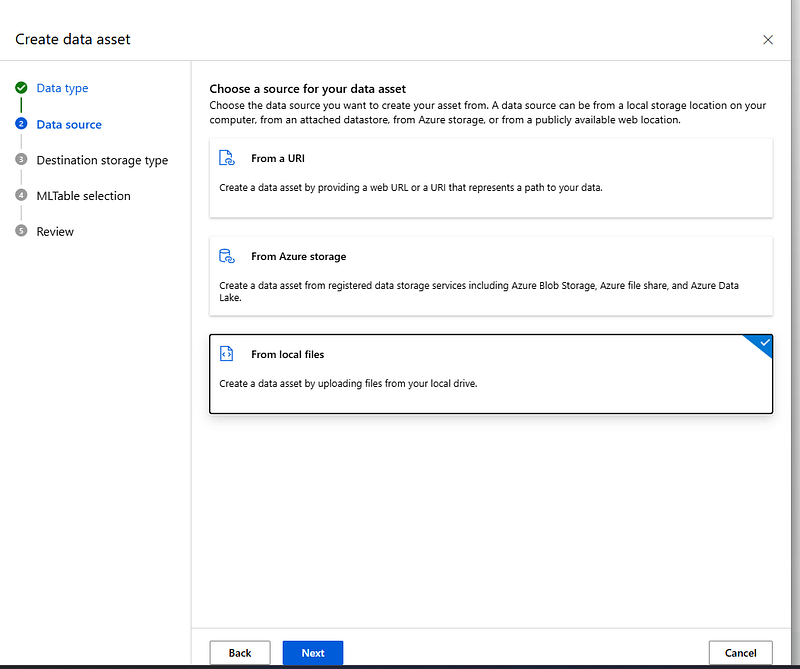
In the Data source step, select From local files to upload the training data you download previously. Select Next.
In the Destination storage type step, verify that Azure Blob Storage is selected as the datastore type and that workspaceblobstore is the datastore selected. Select Next.

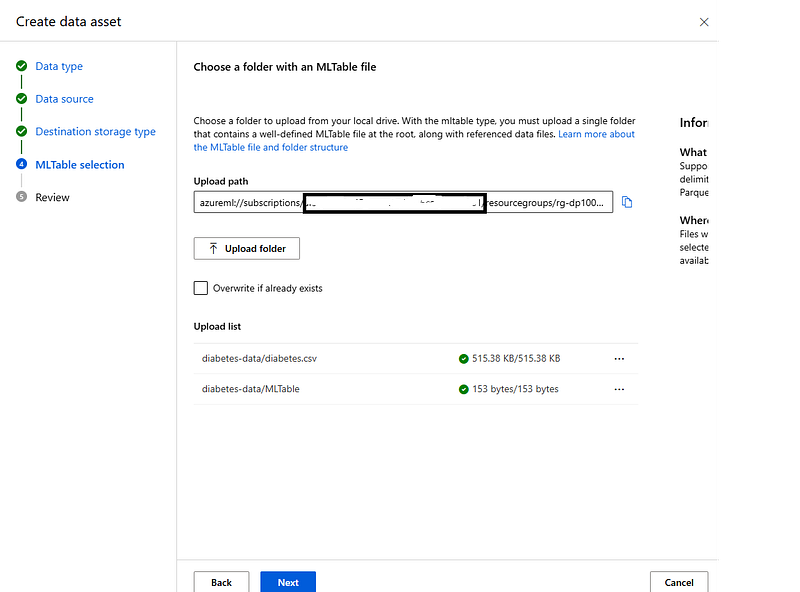
In the MLTable selection step, select Upload folder and select the folder you extracted from the compressed file downloaded earlier. Select Next.
Review the settings for your data asset and select Create.
Back in the Task type & data step, select the data you just uploaded and select Next.
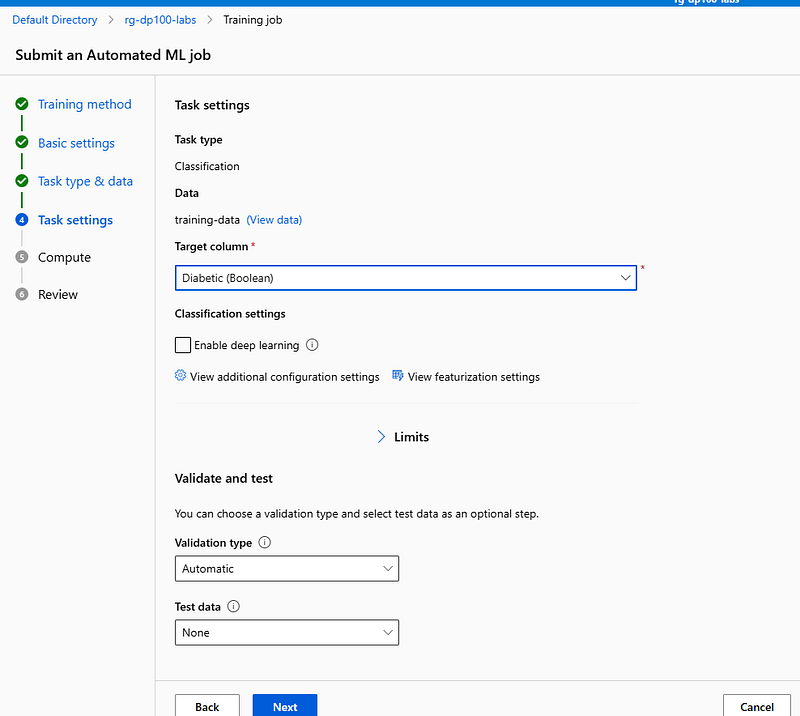
In the Task settings step, select Diabetic (Boolean) as your target column, then open the View additional configuration settings option.
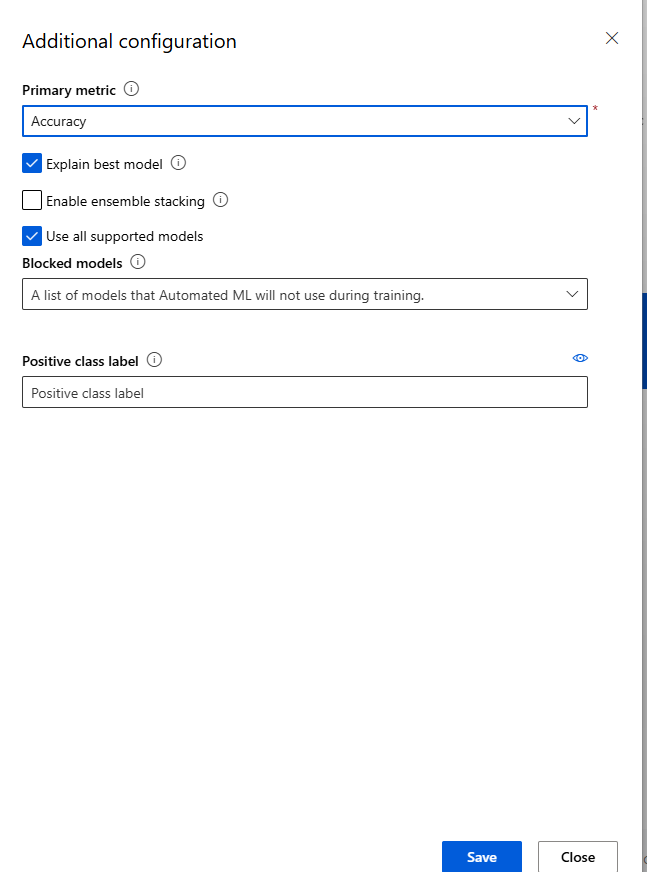
In the Additional configuration pane, change the primary metric to Accuracy, then select Save.
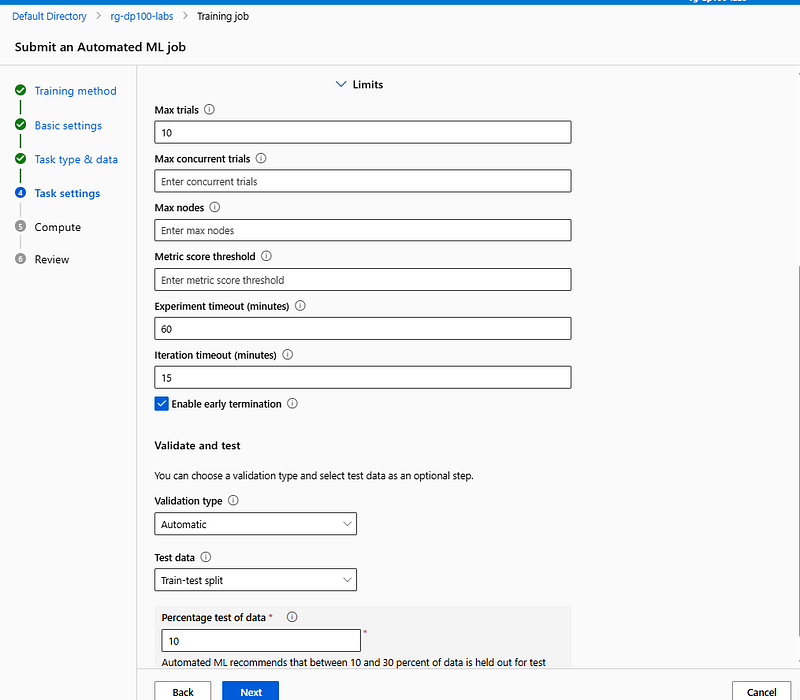
Expand the Limits option and set the following properties:
Max trials: 10
Experiment timeout (minutes): 60
Iteration timeout (minutes): 15
Enable early termination: Checked
For Test data, select Train-test split and verify that the Percentage test of data is 10. Select Next.
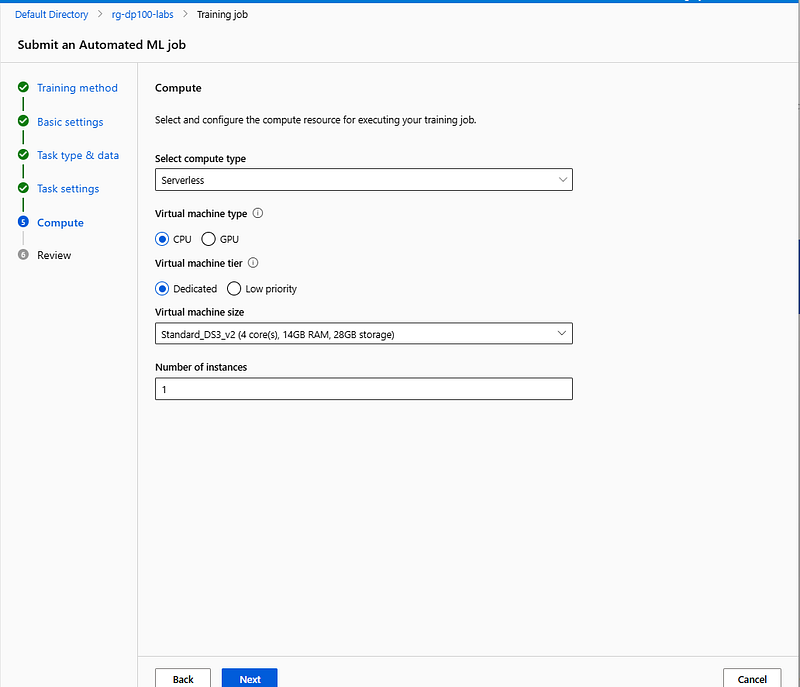
In the Compute step, verify that the compute type is Serveless and the virtual machine size selected is Standard_DS3_v2. Select Next.
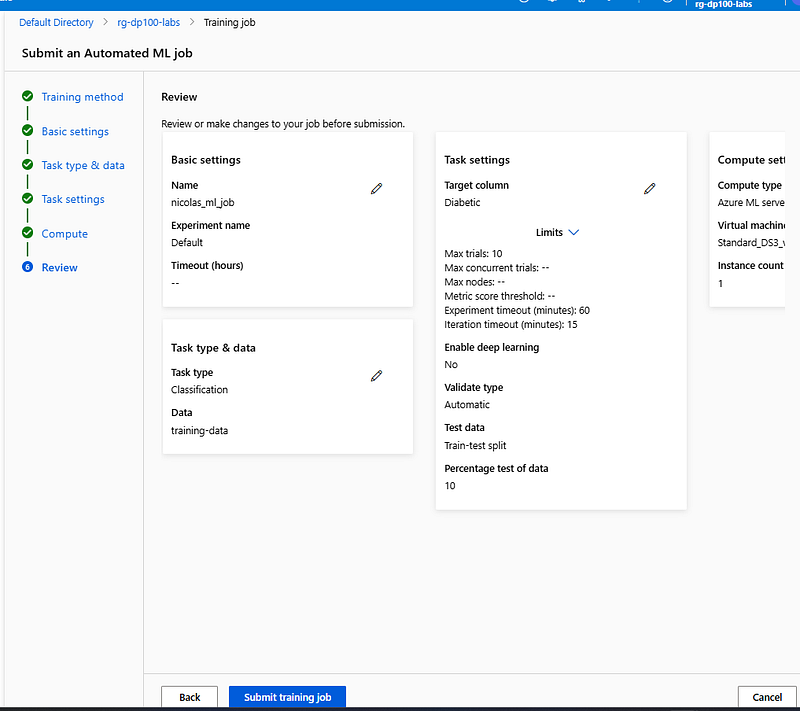
Review all your settings and select Submit training job.
Use jobs to view your history
After submitting the job, you’ll be redirected to the job’s page. Jobs allow you to keep track of the workloads you ran and compare them with each other. Jobs belong to an experiment, which allows you to group job runs together.
Azure Machine Learning automatically records the details of each job you run. This makes it easy to look back at your history and see what you or your teammates have already done. When you’re experimenting, jobs let you track all the models you’ve trained so you can compare results and find the best one. In production, jobs give you a way to confirm that scheduled or automated tasks ran correctly.
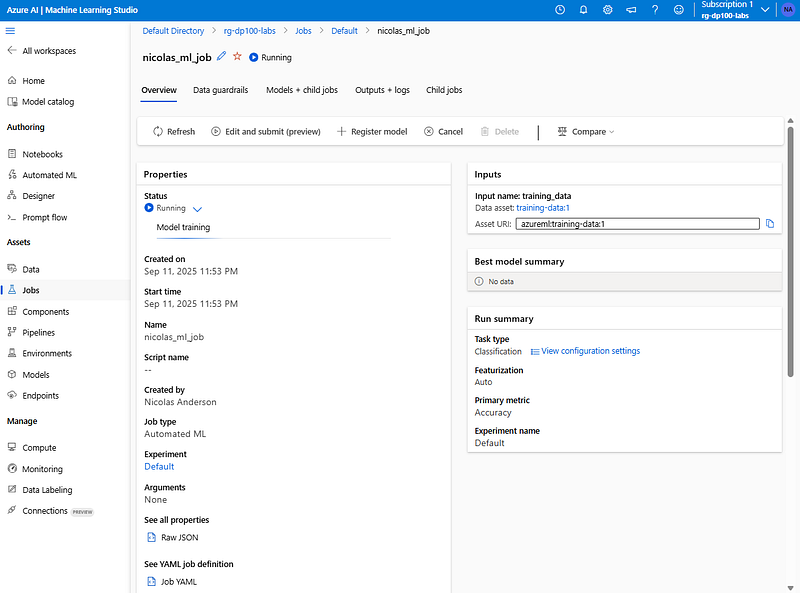
Note that in the Overview parameters, you can find the job’s status, who created it, when it was created and how long it took to run (among other things).
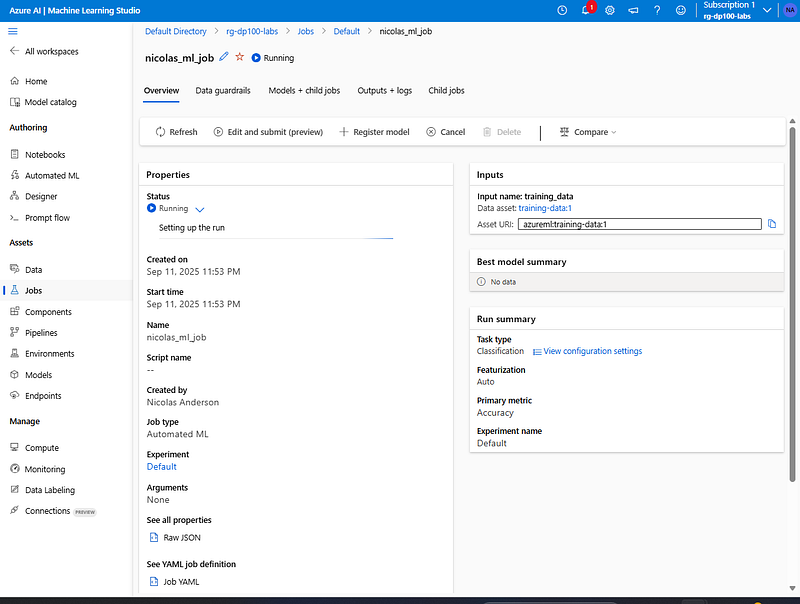
It should take 10–20 minutes for the training job to finish. When it is completed, you can also view the details of each individual component run, including the output. Feel free to explore the job page to understand how the models are trained.
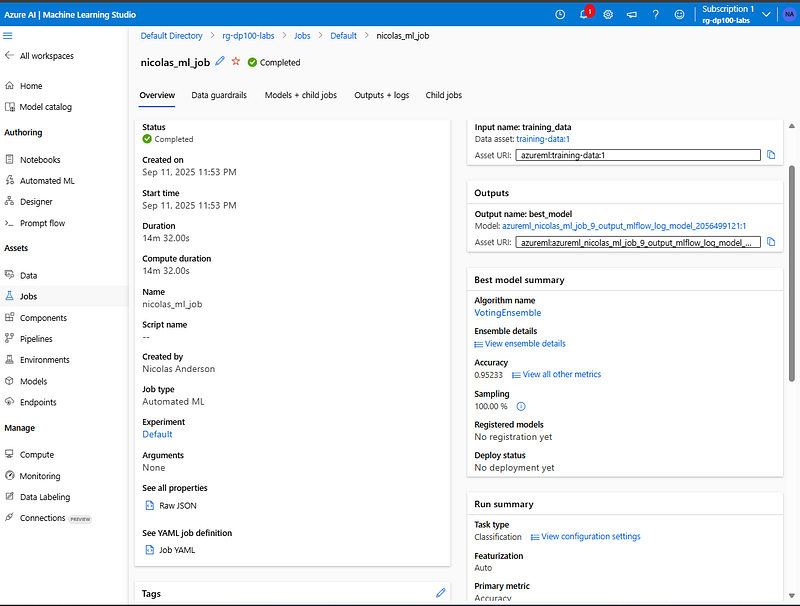
Model Training Results
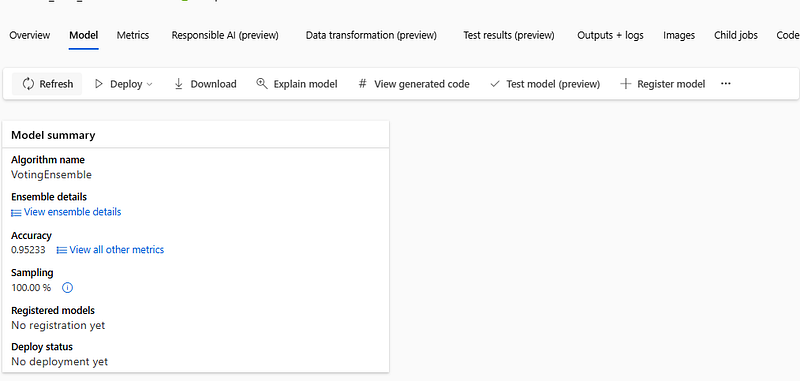
After running the AutoML experiment, the best-performing model selected was a Voting Ensemble. AutoML often favors ensemble methods because they combine predictions from several algorithms, leading to more stable and accurate results.
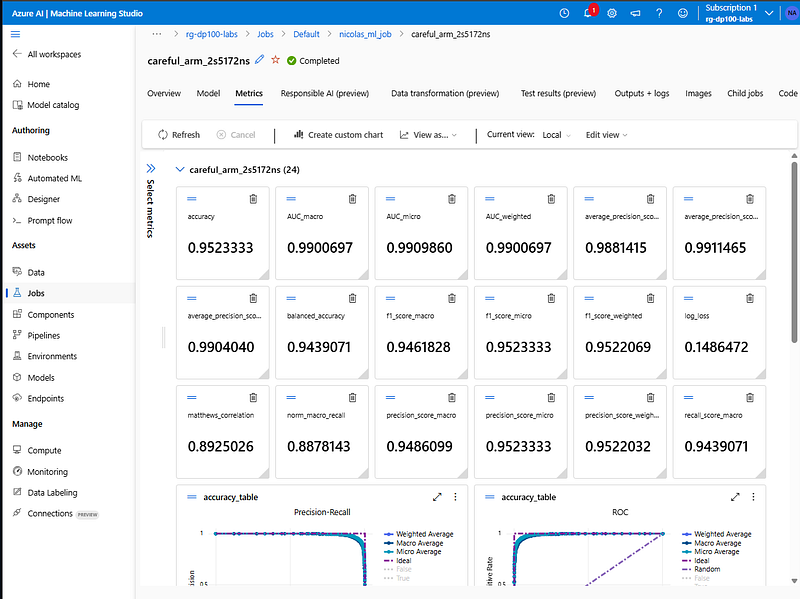
The model achieved an accuracy of ~95%, which is quite strong for a classification problem. Looking deeper at the metrics:
AUC (≈0.99) indicates the model is excellent at distinguishing between diabetic and non-diabetic cases.
Precision and Recall (both above 0.95) show that the model is not only predicting correctly but also balancing false positives and false negatives well.
Log Loss (~0.15) is low, which means the probability estimates are well-calibrated.
The ROC and Precision-Recall curves confirm strong performance, with curves close to the ideal top-left corner.
Key Insights
While the performance metrics look impressive, in real-world healthcare scenarios, accuracy alone is not enough. Missing a diabetic case (false negative) can be more harmful than a false positive. For this reason, recall (sensitivity) is often the most important metric. Azure ML also provides tools such as Responsible AI dashboards, which can help evaluate fairness, interpretability, and potential bias in the model — all essential before deploying a model in production
A voting ensemble combines several strong classifiers and makes a final prediction based on their collective output (majority vote for classification). By aggregating multiple models, it usually delivers more stable and accurate results than any single model.
Conclusion
In this article, I downloaded the diabetes dataset, configured it with an MLTable definition, and used AutoML to train multiple candidate models. AutoML compared different algorithms, tuned hyperparameters, and ultimately selected a Voting Ensemble as the best model, achieving strong metrics (accuracy ~95%, AUC ~0.99). This process showed how Azure ML can automate much of the heavy lifting in model development, while still giving me visibility into results and metrics.
Delete Azure resources
When you finish exploring Azure Machine Learning, you should delete the resources you’ve created to avoid unnecessary Azure costs.
Close the Azure Machine Learning studio tab and return to the Azure portal.
In the Azure portal, on the Home page, select Resource groups.
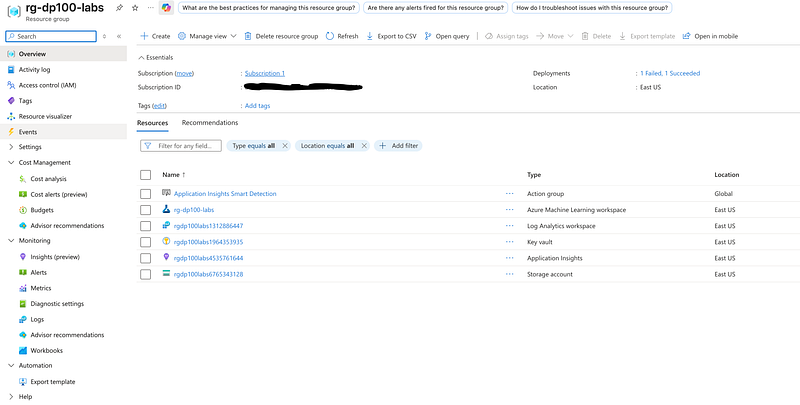
Select the rg-dp100-labs resource group.
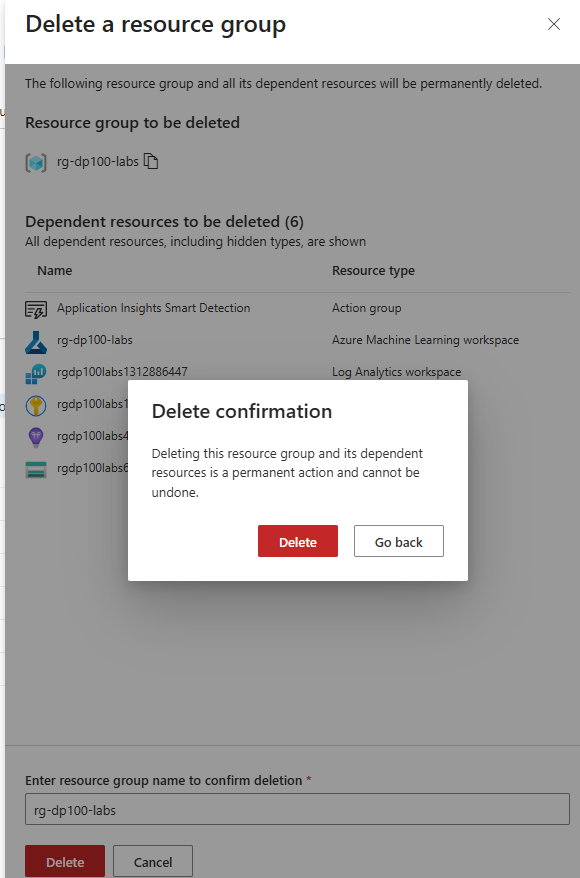
At the top of the Overview page for your resource group, select Delete resource group.
Enter the resource group name to confirm you want to delete it, and select Delete.
Reference:
